


大家好,
今天本魔要來和大家分享如何用 Jetson Nano 接攝影機來定位物體,
和上一篇一樣,
定位物體的方法有下列這些:
如果各位用的鏡頭是 CSI camera 就只要直接執行指令就可以了,輸入:
但因為本魔使用的是 USB Camera,
所以必須要更改設定,
首先輸入:
知道我們的 USB Camera 是編號幾之後就可以更改程式的設定了,輸入:
本魔電腦偵測到的為 0,如圖:

修改完成後就可以儲存並關閉 gedit 了。
接著我們要重新編譯程式,輸入:
畢竟要辨識其它物體還要特地找有點麻煩。
第一次建造模型同樣會花費較多時間,所以請耐心等待一下。
接著你會看到你的鏡頭畫面被顯示在螢幕上了,
我們快點來試試看有什麼臉可以辨識吧!
首先是 3D 列印的一個達爾文頭像:

看來只能定位到本魔的臉而已呢!
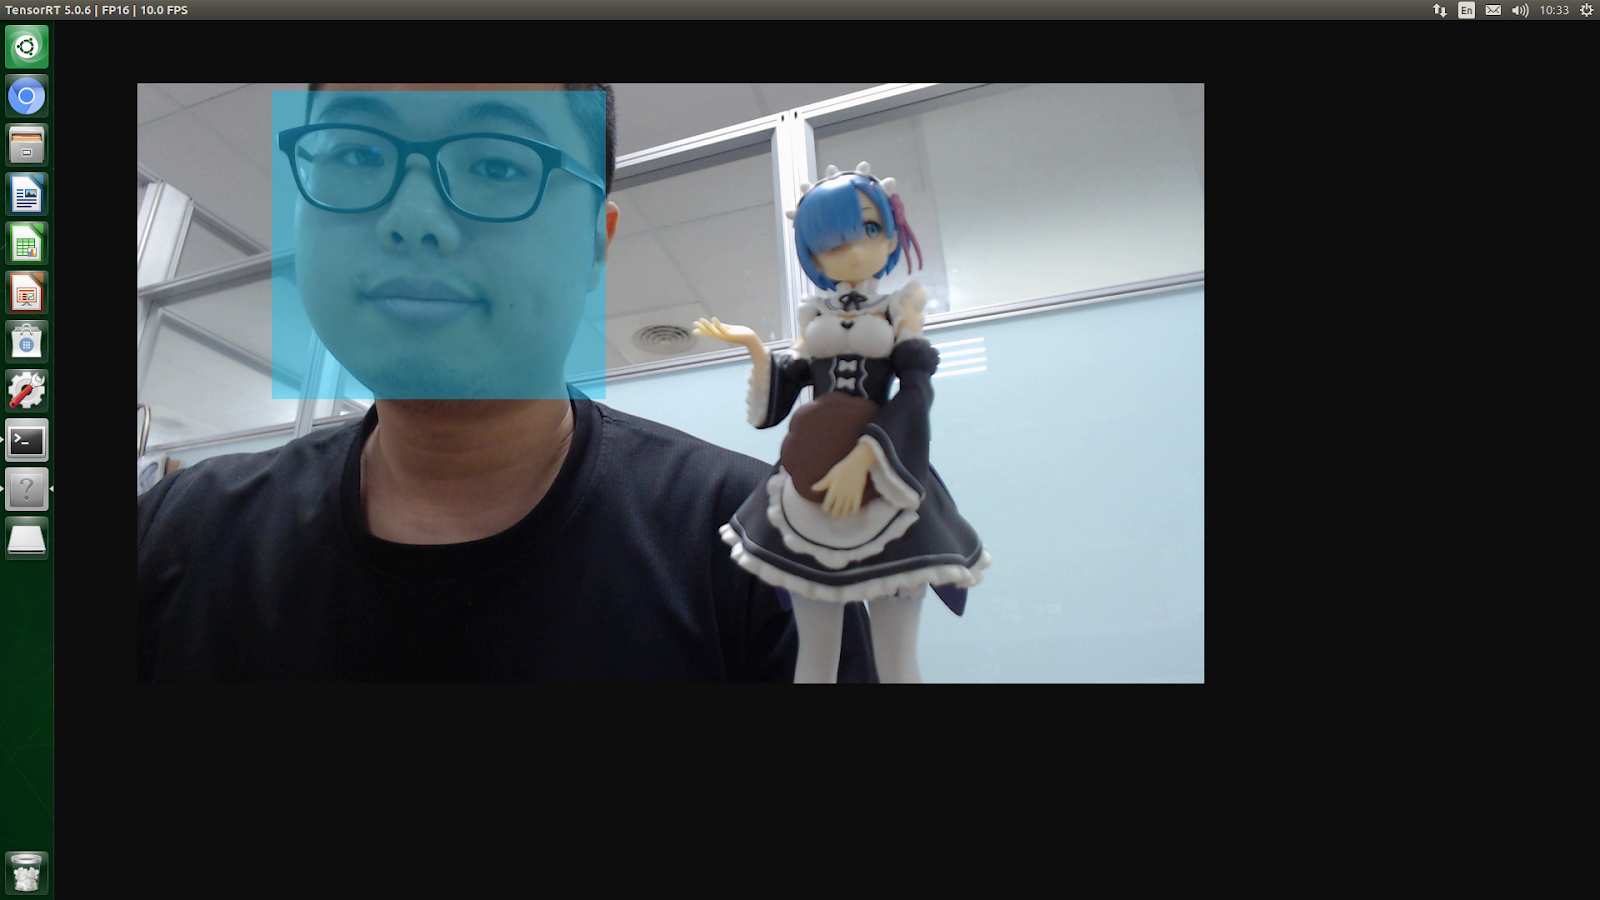
接著拿蕾姆的公仔來試試:

看來還是只有定位出本魔阿!
再來試試之前一樣用 3D 列印印出的骷髏頭,
本魔還幫它加上了頭髮和眼睛嘴巴,

竟然辨識到了!
是不是本魔畫得太維妙維肖了呢!?
本篇的教學就到此為止啦~,
各位一樣可以嘗試用看看其它的方法哦!
喜歡這個系列的話可以追蹤我的blogger哦,
Jetson Nano 官方教學基本上到此為止啦~,
接下來的教學因為要在 PC 上跑,
所以還不確定什麼時候會整理出來和大家分享哦。
如果有疑問或任何指教也歡迎在下方留言提出哦!
今天本魔要來和大家分享如何用 Jetson Nano 接攝影機來定位物體,
和上一篇一樣,
定位物體的方法有下列這些:
- facenet (偵測臉部)
- multiped (偵測複數行人與行李箱)
- pednet (偵測行人)
- coco-bottle (偵測瓶子)
- coco-dog (偵測狗)
如果各位用的鏡頭是 CSI camera 就只要直接執行指令就可以了,輸入:
$ ./detectnet-camera facenet
$ ./detectnet-camera multiped
$ ./detectnet-camera pednet
$ ./detectnet-camera coco-bottle
$ ./detectnet-camera coco-dog
$ ./detectnet-camera                # 不輸入時使用 multiped 方法
但因為本魔使用的是 USB Camera,
所以必須要更改設定,
首先輸入:
$ ls -ltrh /dev/video*你將會找到所有視訊裝置的編號,
知道我們的 USB Camera 是編號幾之後就可以更改程式的設定了,輸入:
$ sudo gedit ~/jetson-inference/detectnet-camera/detectnet-camera.cpp然後將 DEFAULT_CAMERA 改為剛剛我們找到的編號,
本魔電腦偵測到的為 0,如圖:

修改完成後就可以儲存並關閉 gedit 了。
$ cd ~/getson-inference/build/
$ cmake ../
$ make
$ sudo make install
完成後就可以回到 bin 資料夾,並執行程式囉!輸入:$ cd aarch64/bin/
$ ./detectnet-camera facenet
本魔使用的是 facenet 來定位臉部,畢竟要辨識其它物體還要特地找有點麻煩。
第一次建造模型同樣會花費較多時間,所以請耐心等待一下。
接著你會看到你的鏡頭畫面被顯示在螢幕上了,
我們快點來試試看有什麼臉可以辨識吧!
首先是 3D 列印的一個達爾文頭像:

看來只能定位到本魔的臉而已呢!
接著拿蕾姆的公仔來試試:

看來還是只有定位出本魔阿!
再來試試之前一樣用 3D 列印印出的骷髏頭,
本魔還幫它加上了頭髮和眼睛嘴巴,

竟然辨識到了!
是不是本魔畫得太維妙維肖了呢!?
本篇的教學就到此為止啦~,
各位一樣可以嘗試用看看其它的方法哦!
喜歡這個系列的話可以追蹤我的blogger哦,
Jetson Nano 官方教學基本上到此為止啦~,
接下來的教學因為要在 PC 上跑,
所以還不確定什麼時候會整理出來和大家分享哦。
如果有疑問或任何指教也歡迎在下方留言提出哦!


